

Whenever it’s possible I like to automate whatever I can to release myself for other activities and save a huge time that would be wasted on repeatable or time-consuming tasks.
I have been using pieces of the following script for a long time, in a “manual automation” way, let’s say. Getting blocks and loops of scripts and creating and configuring virtual machines as needed.
In the last month I put together in a way that can be shared, and even if you don’t have much experience with powershell, you can still make use of it. 🙂
Prerequisites
Install PowerCLI Module
|
1 |
Install-Module VMware.PowerCLI |
The offline installation is available here.
Virtual Machine Template
Create a virtual machine template to be used as a base image for the deployment. No special requirements here, create accordingly to your environment.
VM Customization Specifications
Create two virtual machine customization specifications on vCenter (Linux and Windows). The only requirement is to set DNS under network section for the Linux, otherwise you might have issues after the deployment within the guest os.
CSV File
That’s the source file with all virtual machine details. There must be certain columns with specific values. These values are shown below:
- Name
- vCPU
- vRAM
- vNetwork
- vDisk2 ..N
- IP
- Subnet
- Gateway
- Datastore
- VMFolder
- Specs
- Template
- Notes
- OSType
- Dns1
- Dns2
You can download an example spreadsheet in the link below.
Each line will be specific to a virtual machine. That’s how the loop will read and create/configure accordingly.
vDisks columns can be increased as many required (vDisk2, vDisk3, vDisk4, etc.). For those VMs which doens’t use the additional disks, put “0” where not required. It starts at vDisk2 to be easily identified later, as vDisk1 will be the OSDisk from template. The vDisk format can be also changed, line 63 in the script.
The OSType value should be either “Windows” or “Linux“, that’s just a condition in order to properly run the VM creation per GuestOS.
Running the script it will always prompt for the CSV file, insert the full path location.

The next step will prompt vCenter credentials, once confirmed it won’t be prompted again if you run the script on the same powershell session.

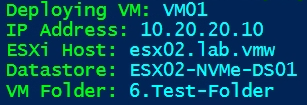
The script then starts to read each value and deploy the VMs accordingly:
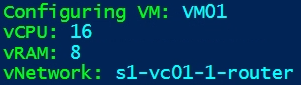
After initial deployment, the script will configure the VMs, in that section custom settings are configured, like vCPU, vRAM, vNetwork, etc.
At the end you should see a message of deployment complete and the VMs will be powered on, and probably customization specifications will be running. After that the virtual machines will be ready for use and fully customized.
Check the full script below, save as *.ps1 and use Powershell ISE or Powershell to run.
Enjoy 🙂
|
1 2 3 4 5 6 7 8 9 10 11 12 13 14 15 16 17 18 19 20 21 22 23 24 25 26 27 28 29 30 31 32 33 34 35 36 37 38 39 40 41 42 43 44 45 46 47 48 49 50 51 52 53 54 55 56 57 58 59 60 61 62 63 64 65 66 67 68 69 70 71 72 73 74 75 76 77 78 79 80 81 82 83 84 85 86 87 88 89 90 91 92 93 94 95 96 |
<# .SYNOPSIS Create Virtual Machines from a CSV file .DESCRIPTION The scripts create and configure virtual machines based on a CSV file The VM is customized and powered on after deployment .INSTRUCTIONS Install the VMware PowerCLI Powershell Module (Install-Module VMware.PowerCLI, Internet Connection required) Offline Install available on https://developer.vmware.com/web/tool/vmware-powercli -> Create the CSV file based on the template provided and enter the required details -> Add new vDisks columns as required, the script will create vDisks accordingly Put zero where vDisks are not required -> Validate if all proper values are correct on the spreadsheet: - Specs: vCenter Customization Specifications Name - OSType: Windows or Linux (Only for a condition in the script) - Folder: If the folder name exists in 2 different locations, you might get errors. No spaces is also helpful. All the rest is self-explanatory -> Create the Customization Specifications on vCenter Server In Linux Specifications add the required DNS Servers in Network section There's no specific setting to be configured in the Specifications Recommend to create a new one specific for the PS Script, as some values will be overwritten everytime you run the script -> Change Disk Format in "#.VM Configuration Details" line 63, if required -> Save the spreadsheet as *.csv -> Run the script and enter the values as prompted -> The script also creates a transcript on users' Documents folder .AUTHOR Rafael Moura @ VirtuallyAnything.net - Dec/2021 .VERSION 1.0 (Dec/2021) 1.1 (Fev/2023) Added command for the network card to start and stay connected at power on (Suggested/Commented by Gab) #> #.#.# Variables #.#.# Write-Host "- - Setting Variables - -" -ForegroundColor Cyan #.CSV File Write-Host "CSV File" -ForegroundColor Green $CSV = Read-Host -Prompt 'Enter the CSV File Path (i.e. D:\Files\MyVMs.csv)' $DeployVMs = Import-Csv $CSV Write-Host "vCenter Server Connection and Credentials" -ForegroundColor Green #.vCenter Server Details If($vCenterCreds -eq $null){ $vCenterConn = Read-Host -Prompt 'Enter the vCenter Server FQDN (i.e. vcs01.lab.vmw)' $vCenterCreds = Get-Credential -Message ("Enter the Credentials for vCenter Server "+$vCenterConn) } else{ Write-Host "Credentials for $vCenterConn already acquired" -ForegroundColor Green } Write-Host "Connecting to vCenter Server $vCenterConn" -ForegroundColor Green Set-PowerCLIConfiguration -InvalidCertificateAction Ignore -Confirm:$false | Out-Null Connect-VIServer -Server $vCenterConn -Credential $vCenterCreds | Out-Null #.VM Configuration Details $DiskFormat = 'thin' # Options: Thin / Thick / EagerZeroedThick #.--------------------------------------------------------------------------------------------------.# #. Don't change any value below .# #.--------------------------------------------------------------------------------------------------.# #. Start-Transcript Write-Host "::: Action Phase :::" -ForegroundColor Green Write-Host "::: Virtual Machines Deployment in Progress :::" -ForegroundColor Green Start-Sleep 2 #. foreach($vm in $DeployVMs){ Write-host "Deploying VM: " -ForegroundColor Green -NoNewline; Write-Host $vm.Name -ForegroundColor Cyan; Write-Host "IP Address: "-ForegroundColor Green -NoNewline; Write-Host $vm.IP -ForegroundColor Cyan; Write-Host "ESXi Host: "-ForegroundColor Green -NoNewline; Write-Host $vm.ESXi -ForegroundColor Cyan; Write-Host "Datastore: "-ForegroundColor Green -NoNewline; Write-Host $vm.Datastore -ForegroundColor Cyan; Write-host "VM Folder: " -ForegroundColor Green -NoNewline; Write-Host $vm.VMFolder -ForegroundColor Cyan; Write-Host ""; If($vm.OSType -eq "Windows"){ Get-OSCustomizationSpec $vm.Specs -Server $vCenterConn | Get-OSCustomizationNicMapping | Set-OSCustomizationNicMapping -IpMode UseStaticIP -IpAddress $vm.IP -SubnetMask $vm.Subnet -DefaultGateway $vm.Gateway -Dns $vm.Dns1,$vm.Dns2 | Out-Null } else { Get-OSCustomizationSpec $vm.Specs -Server $vCenterConn | Get-OSCustomizationNicMapping | Set-OSCustomizationNicMapping -IpMode UseStaticIP -IpAddress $vm.IP -SubnetMask $vm.Subnet -DefaultGateway $vm.Gateway | Out-Null } Get-OSCustomizationSpec $vm.Specs -Server $vCenterConn | Set-OSCustomizationSpec -NamingScheme fixed -NamingPrefix $vm.Name | Out-Null New-VM -Name $vm.Name -VMhost $vm.ESXi -Template $vm.Template -OSCustomizationSpec $vm.Specs -confirm:$false -Datastore $vm.Datastore -Location $vm.VMFolder -Notes $vm.Notes | Out-Null } #. foreach($vm in $DeployVMs){ $VMDisks = ($DeployVMs | Get-Member -MemberType All) | Where-Object {$_.Name -match 'vDisk'} $VMCores = ($vm.vCPU/2) $VMPg = Get-VDPortgroup -Name $vm.vNetwork Write-host "Configuring VM: " -ForegroundColor Green -NoNewline; Write-Host $vm.Name -ForegroundColor Cyan; Write-Host "vCPU: "-ForegroundColor Green -NoNewline; Write-Host $vm.vCPU -ForegroundColor Cyan; Write-Host "vRAM: "-ForegroundColor Green -NoNewline; Write-Host $vm.vRAM -ForegroundColor Cyan; Write-Host "vNetwork: "-ForegroundColor Green -NoNewline; Write-Host $vm.vNetwork -ForegroundColor Cyan; Write-Host ""; Get-VM $vm.Name | Set-VM -NumCPU $vm.vCPU -MemoryGB $vm.vRAM -CoresPerSocket $VMCores -Confirm:$false | Out-Null foreach($vdisk in $VMDisks){ If($vm.($vdisk.Name) -ne '0'){ Get-VM $vm.Name | New-HardDisk -CapacityGB $vm.($vdisk.Name) -Datastore $vm.Datastore -StorageFormat $DiskFormat | Out-Null } } Get-VM $vm.Name | Get-NetworkAdapter | Set-NetworkAdapter -Portgroup $VMPg -Confirm:$false | Out-Null Get-VM $vm.Name | Get-NetworkAdapter -Name "Network adapter 1" | Set-NetworkAdapter -StartConnected:$true -Confirm:$false | Out-Null Get-VM $vm.Name | Start-VM | Out-Null } #. Write-Host "::: Virtual Machines Deployment Complete :::" -ForegroundColor Green Stop-Transcript |