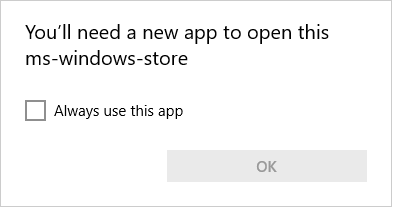
Couple weeks ago I faced an issue with a client where many users from a Horizon dedicated pool were complaining about not being able to open the Calculator in Windows 10.

Well, that’s simple right? VMware OSOT removed it during the optimization process as it wasn’t selected as a exception. It should be easy reinstalling, if you ever worked with Appx Packages in Windows 10 you know that’s not true. 🙂
I knew a couple solutions, like reinstalling from the Microsoft Store, using PowerShell with AppxPackage and AppxProvisionedPackage commands, even with DISM. No luck.
I google it and couldn’t find any solution that works for me in that case. After validating many things and doing some tests, I found a solution. As I didn’t find that around, have made this post.
What happened was the Appx installation files and its dependencies were not present on that desktop anymore. Needing to be registered again and them reinstalled, also some permissions required to do that.
First of all you gonna need a brand new Windows 10, it is better at the same patch level as your problematic desktop, however it works with newer versions.
- Navigate to C:\Program Files\ and take the ownership of WindowsApps folder (C:\Program Files\WindowsApps), with an administrative account.
- On that WindowsApps folder add the permission “Full Control” to the group “All Application Packages”, also select “Replace all Child Objects”.
- Copy the following sub-folders from WindowsApps. The versions might be different as it depends on windows update and patch level.
- Microsoft.WindowsCalculator_10.1812.10048.0_x64__8wekyb3d8bbwe
- Microsoft.WindowsCalculator_10.1812.10048.0_neutral_split.scale-100_8wekyb3d8bbwe
- Microsoft.UI.Xaml.2.0_2.1810.18004.0_x64__8wekyb3d8bbwe
- Microsoft.VCLibs.140.00_14.0.29231.0_x64__8wekyb3d8bbwe
- Reinstall the dependencies, with the following commands:
- Add-AppxPackage -register “C:\Program Files\WindowsApps\Microsoft.VCLibs.140.00_14.0.29231.0_x64__8wekyb3d8bbwe\AppxManifest.xml” -DisableDevelopmentMode
- Add-AppxPackage -register “C:\Program Files\WindowsApps\Microsoft.UI.Xaml.2.0_2.1810.18004.0_x64__8wekyb3d8bbwe\AppxManifest.xml” -DisableDevelopmentMode
- Reinstall the application, with the following commands:
- Add-AppxPackage -register “C:\Program Files\WindowsApps\Microsoft.WindowsCalculator_10.1812.10048.0_x64__8wekyb3d8bbwe\AppxManifest.xml” -DisableDevelopmentMode
- Add-AppxPackage -register “C:\Program Files\WindowsApps\Microsoft.WindowsCalculator_10.1812.10048.0_neutral_split.scale-100_8wekyb3d8bbwe\AppxManifest.xml” -DisableDevelopmentMode
Try to open the calculator app again, it should work.
That’s it. 🙂
Leave a Comment


